โปรเจค หุ่นยนต์ ESP8266 NodeMCU V2 ควบคุมด้วย แอพ Blynk
6 ปีที่ผ่านมา
โดย เจ้าของร้าน
โปรเจค นี้จะเป็นการนำ ESP8266 NodeMCU V2 ESP-12E มาทำเป็น หุ่นยนต์ Robot car และ ควบคุมด้วยแอพ Blynk ผ่าน WiFi
NodeMCU V2 เป็นบอร์ดที่ใช้ ESP8266 เป็น CPU สำหรับประมวลผลโปรแกรมต่างๆ มีข้อดีกว่า Arduino ตรงที่ตัวมันมีขนาดเล็กกว่า มีพื้นที่เขียนโปรแกรมลงไปมากกว่า และสามารถเชื่อมต่อกับ WiFi ได้
อุปกรณ์ที่ใช้
1. 2WD Smart Car Robot Chassis Kits
2. NodeMCU V2 CP2102 Lua WIFI ESP8266 ESP-12E
3. Micro USB Cable Wire 1m for NodeMCU
4. Motor Drive Module L298N
5. Jumper (M2M) cable wire 40pcs 2.54mm 20cm Male to Male
6. Jumper (F2F) cable wire 40pcs 2.54mm 20cm Female to Female
7. Jumper (F2M) cable wire 40pcs 10 cm 2.54mm Female to Male
8. สกรูหัวกลม+น็อตตัวเมีย ขนาด 3มม ยาว 12 มม.
9. รางถ่าน 18650 - 2 ก้อน
10. ถ่านชาร์จ 18650 Panasonic NCR18650B จำนวน 2 ก้อน
การจะใช้ NodeMCU ได้นั้น จำเป็นต้องติดตั้ง แพลตฟอร์ม ESP8266 เพื่อ ทำการติดต่อ ระหว่าง Arduino IDE กับ NodeMCU
ลิงค์ : ขั้นตอนการติดตั้ง แพลตฟอร์ม ESP8266
https://robotsiam.blogspot.com/2017/06/esp8266-platform-nodemcu.html
ลิงค์ : การใช้งาน NodeMCU V2 ESP8266 ESP-12E
https://robotsiam.blogspot.com/2017/06/nodemcu-lua-wifi-esp8266-esp-12e-module.html
เริ่มต้นด้วยการ ประกอบ 2WD Smart Car Robot Chassis Kits

ภาพรวม การประกอบ รางถ่านแบบ 18650 และ เชื่อมต่อ Motor Drive Module L298N เข้ากับ NodeMCU V2 ตามรูป
เริ่มด้วย ใช้ สกรูหัวกลม+น็อตตัวเมีย ยาว 12 มม. ยึด รางถ่านแบบ 18650 และ เชื่อมต่อ สายสีแดง ขั้วบวก เข้าที่ เพาเวอร์สวิตซ์สำหรับเปิดปิด (ON / OFF )
ใช้ สกรูหัวกลม+น็อตตัวเมีย ยาว 12 มม. ยึด Motor Drive Module L298N
ใช้ จั้มเปอร์ ผู้-ผู้ สีแดง ต่อจาก สวิทช์ อีกด้าน เข้า ไฟ+ Motor Drive และ ใช้ จั้มเปอร์ ผู้-ผู้ สีดำ ต่อจากสายสีดำ ของรางถ่าน เข้า GND ของ Motor Drive

การใช้งาน Digital/Input ซึ่งการใช้งาน Digital I/O ของ ESP8266 นั้น สามารถใช้งานคำสั่ง digitalWrite, digitalRead ได้เช่นเดียวกับการใช้งาน Digital I/O ของ Arduino โดยกำหนดหมายเลขของ Pin เช่นตัวอย่าง Pin ที่ 5 หรือจะกำหนดชื่อ Pin โดยอ้างตามชื่อ Pin บนบอร์ด NodeMCU V2 เป็น D1 ก็ได้เช่นกัน
การต่อวงจร ระหว่าง NodeMCU กับ Motor Driver
ใช้ จั้มเปอร์ เมีย-เมีย ในการเชื่อมต่อ
D1 <-> IN1
D3 <-> IN2
D2 <-> IN3
D4 <-> IN4
Upload โปรแกรม ทดสอบการทำงาน
1. ตรวจสอบการติดตั้งไดร์เวอร์ ของ NodeMCU V2
(ถ้าไม่พบให้ทำการติดตั้งไดร์เวอร์ก่อน)
การติดตั้งโปรแกรม Arduino (IDE) และ การติดตั้งไดร์เวอร์
การติดตั้งโปรแกรม Arduino (IDE) และ การติดตั้งไดร์เวอร์
2.ทดสอบ การเคลื่อนที่ของหุ่นยนต์
เปิดโปรแกรม Arduino (IDE) และ Upload โค้ดนี้ ไปยัง บอร์ด NodeMCU V2
// Motor A pins
int enableA = 12; // D6 - ENB
int pinA2 = 4; // D2 - IN3
int pinA1 = 2; // D4 - IN4
//Motor B pins
int enableB = 14; // D5 - ENA
int pinB2 = 5; // D1 - IN1
int pinB1 = 0; // D3 - IN2
//This lets you run the loop a single time for testing
boolean run = true;
void setup() {
pinMode(enableA, OUTPUT);
pinMode(pinA1, OUTPUT);
pinMode(pinA2, OUTPUT);
pinMode(enableB, OUTPUT);
pinMode(pinB1, OUTPUT);
pinMode(pinB2, OUTPUT);
}
void loop() {
if (run) {
for (int i = 0; i <= 500; i++) {
delay(10);
}
enableMotors();
//Go forward
forward(400);
coast(200);
//Go backward
backward(400);
coast(200);
//Turn left
turnLeft(400);
coast(200);
//Turn right
turnRight(400);
coast(200);
//This stops the loop
run = false;
}
}
//Define high-level H-bridge commands
void enableMotors()
{
motorAOn();
motorBOn();
}
void disableMotors()
{
motorAOff();
motorBOff();
}
void forward(int time)
{
motorAForward();
motorBForward();
delay(time);
}
void backward(int time)
{
motorABackward();
motorBBackward();
delay(time);
}
void turnLeft(int time)
{
motorABackward();
motorBForward();
delay(time);
}
void turnRight(int time)
{
motorAForward();
motorBBackward();
delay(time);
}
void coast(int time)
{
motorACoast();
motorBCoast();
delay(time);
}
void brake(int time)
{
motorABrake();
motorBBrake();
delay(time);
}
//Define low-level H-bridge commands
//enable motors
void motorAOn()
{
digitalWrite(enableA, HIGH);
}
void motorBOn()
{
digitalWrite(enableB, HIGH);
}
//disable motors
void motorAOff()
{
digitalWrite(enableB, LOW);
}
void motorBOff()
{
digitalWrite(enableA, LOW);
}
//motor A controls
void motorAForward()
{
digitalWrite(pinA1, HIGH);
digitalWrite(pinA2, LOW);
}
void motorABackward()
{
digitalWrite(pinA1, LOW);
digitalWrite(pinA2, HIGH);
}
//motor B controls
void motorBForward()
{
digitalWrite(pinB1, HIGH);
digitalWrite(pinB2, LOW);
}
void motorBBackward()
{
digitalWrite(pinB1, LOW);
digitalWrite(pinB2, HIGH);
}
//coasting and braking
void motorACoast()
{
digitalWrite(pinA1, LOW);
digitalWrite(pinA2, LOW);
}
void motorABrake()
{
digitalWrite(pinA1, HIGH);
digitalWrite(pinA2, HIGH);
}
void motorBCoast()
{
digitalWrite(pinB1, LOW);
digitalWrite(pinB2, LOW);
}
void motorBBrake()
{
digitalWrite(pinB1, HIGH);
digitalWrite(pinB2, HIGH);
}
เลือก Port ในตัวอย่างเป็น "COM12"
เลือก Board : NodeMCU 1.0 (ESP-12E Module)
Upload
ถ้ามีปัญหา Upload ไม่เข้า ขึ้น Error แสดงข้อความว่า ตามรูปภาพ
warning: espcomm_sync failed
error: espcomm_open failed
error: espcomm_upload_mem failed
ให้กดปุ่ม RST 1 ครั้ง และ กดปุ่ม FLASH บนบอร์ด ของ NodeMCU ค้างไว้ ในขณะที่ทำการอัพโหลดโปรแกรม
รอจนกระทั่ง Done uploading. 100%
ถ้าทุกอย่างถูกต้อง ทดลอง ยกลงวางที่พื้นแล้ว ทดสอบ ปิดเปิด สวิทช์ไฟ Power ถ้าทุกอย่างถูกต้อง ปรกติ หุ่นยนต์จะเคลื่อนที่ไปข้างหน้า-ถอยหลัง แล้ว เลี้ยวซ้าย แล้ว เลี้ยวขวา
ถ้าหุ่นยนต์ เคลื่อนที่ปรกติ แสดงว่า หุ่นยนต์ของเราพร้อมทำงานแล้ว
(ถ้าต้องการทดสอบใหม่ ให้ ปิดเปิด สวิทช์ไฟใหม่)
3.การสร้างแอพ Blynk สำหรับหุ่นยนต์ NodeMCU V2
Blynk Application เป็นโปรแกรมบนมือถือที่ทำให้เราสร้างหน้าต่างควบคุมหรือแสดงผลเชื่อมต่อกับพวกไมโครคอนโทรเลอร์(Ardunio, ESP8266, Raspberry Pi) ได้ง่ายๆ โดยไปที่ Play Store ค้นหา Blynk
https://play.google.com/store/apps/details?id=cc.blynk&hl=th
หรือ
https://blynk.th.aptoide.com/
ติดตั้ง เหมือน App ทั่วๆไป
เปิด Blynk Application ขึ้นมา
-> Create New Account

กรอก อีเมล และ พาสเวิด -> Sign Up

-> New Project

ตั้งชื่อ Project ในตัวอย่างชื่อ robot_car -> Create
โปรกรม จะส่ง Auth Toke ไปที่ อีเมล ที่เรากรอกไว้ -> OK
โดยทุกๆครั้งที่เริ่มสร้างโปรเจคใหม่ AUTH TOKEN จะถูกเปลี่ยนใหม่เสมอ ซึ่ง KEY นี้เองที่เป็นเสมือนกุญแจสำหรับเชื่อมต่อ
คลิก เครื่องหมาย +
ดาวน์โหลด ไลบรารี่ Blynk
คลิกที่ Clone or download
เปิด โปรแกรม Arduino IDE
ไปที่ ไลบรารี blynk-library-master.zip ที่เรา ดาวน์โหลด มา -> Open
ตรวจสอบที่ Skecth -> Include Library จะพบ ไลบรารี Blynk เพิ่มเข้ามาใน Arduino IDE ของเรา
1. char auth[] = "xxxxxxxxxxxxxxxxxxxxxxxxxxxxxxxx";
เป็นค่าที่เราได้รับจาก ที่ Blynk ส่ง อีเมล ให้เรา


ในตัวอย่างนี้แก้เป็น
char auth[] = "264b50a5284642c09eff8a0815cff21e";
2. char ssid[] = "MyWifi";
แก้เป็น ชื่อ WiFi ที่ต้องการเชื่อมต่อ
3. char pass[] = "MyWifiPassword";
แก้เป็น รหัสผ่าน ของWiFiที่ต้องการเชื่อมต่อ
แล้วจีง Upload โค้ดที่แก้ไขแล้ว ไปยัง บอร์ด NodeMCU V2
/**************************************************************
เลือก Port ในตัวอย่างเป็น "COM12"

เลือก Board : NodeMCU 1.0 (ESP-12E Module)

Upload

ถ้ามีปัญหา Upload ไม่เข้า ขึ้น Error แสดงข้อความว่า ตามรูปภาพ

ให้กดปุ่ม RST 1 ครั้ง และ กดปุ่ม FLASH บนบอร์ด ของ NodeMCU ค้างไว้ ในขณะที่ทำการอัพโหลดโปรแกรม

รอจนกระทั่ง Done uploading. 100%

กลับไปที่ Blynk Application คลิกที่ เครื่องหมาย สามเหลี่ยม เพื่อทดสอบการทำงาน

วีดีโอผลลัพธ์การทำงานของ โปรเจค หุ่นยนต์ ESP8266 NodeMCU V2 ควบคุมด้วย แอพ Blynk
คลิก เครื่องหมาย +
เพิ่ม Button อีก 3 ปุ่ม ตั้งค่า จัดวางตำแหน่ง ตามรูป
ปุ่ม BACK เลือก Virtual -> V1 -> CONTINUE
ปุ่ม RIGHT เลือก Virtual -> V2 -> CONTINUE
ปุ่ม LEFT เลือก Virtual -> V3 -> CONTINUE
ปุ่ม BACK เลือก Virtual -> V1 -> CONTINUE
ปุ่ม RIGHT เลือก Virtual -> V2 -> CONTINUE
ปุ่ม LEFT เลือก Virtual -> V3 -> CONTINUE
การติดตั้ง ไลบรารี่ Blynk
ดาวน์โหลด ไลบรารี่ Blynk
คลิกที่ Clone or download
คลิกที่ Download ZIP
เปิด โปรแกรม Arduino IDE
ไปที่ Skecth -> Include Library -> Add .ZIP Library...
ไปที่ ไลบรารี blynk-library-master.zip ที่เรา ดาวน์โหลด มา -> Open
ตรวจสอบที่ Skecth -> Include Library จะพบ ไลบรารี Blynk เพิ่มเข้ามาใน Arduino IDE ของเรา
ก่อน Upload โปรแกรม มีค่าเฉพาะที่ต้องแก้ไข อยู่ 3 ค่าด้วยกันคือ
1. char auth[] = "xxxxxxxxxxxxxxxxxxxxxxxxxxxxxxxx";
เป็นค่าที่เราได้รับจาก ที่ Blynk ส่ง อีเมล ให้เรา


ในตัวอย่างนี้แก้เป็น
char auth[] = "264b50a5284642c09eff8a0815cff21e";
2. char ssid[] = "MyWifi";
แก้เป็น ชื่อ WiFi ที่ต้องการเชื่อมต่อ
3. char pass[] = "MyWifiPassword";
แก้เป็น รหัสผ่าน ของWiFiที่ต้องการเชื่อมต่อ
แล้วจีง Upload โค้ดที่แก้ไขแล้ว ไปยัง บอร์ด NodeMCU V2
/**************************************************************
* This example runs directly on NodeMCU chip
* using the Blynk platform and mobile application.
* Change WiFi ssid, password, and Blynk auth token to run :)
**************************************************************/
#define BLYNK_PRINT Serial // Comment this out to disable prints and save space
#include <ESP8266WiFi.h>
#include <BlynkSimpleEsp8266.h>
#define RightMotorSpeed 5 // D1 <-> IN1
#define RightMotorDir 0 // D3 <-> IN2
#define LeftMotorSpeed 4 // D2 <-> IN3
#define LeftMotorDir 2 // D4 <-> IN4
#define RightMotorDir 0 // D3 <-> IN2
#define LeftMotorSpeed 4 // D2 <-> IN3
#define LeftMotorDir 2 // D4 <-> IN4
// You should get Auth Token in the Blynk App.
// Go to the Project Settings (nut icon).
char auth[] = "xxxxxxxxxxxxxxxxxxxxxxxxxxxxxxxx";
char ssid[] = "MyWifi";
char pass[] = "MyWifiPassword";
void setup()
{
Serial.begin(9600);
Blynk.begin(auth, ssid, pass);
pinMode(RightMotorSpeed, OUTPUT);
pinMode(RightMotorDir, OUTPUT);
pinMode(LeftMotorSpeed, OUTPUT);
pinMode(LeftMotorDir, OUTPUT);
}
void loop()
{
Blynk.run();
}
void halt()
{
digitalWrite(RightMotorSpeed, LOW);
digitalWrite(LeftMotorSpeed, LOW);
}
void forward()
{
digitalWrite(RightMotorDir, HIGH);
digitalWrite(LeftMotorDir, HIGH);
digitalWrite(RightMotorSpeed, LOW);
digitalWrite(LeftMotorSpeed, LOW);
}
void reverse()
{
digitalWrite(RightMotorDir, LOW);
digitalWrite(LeftMotorDir, LOW);
digitalWrite(RightMotorSpeed, HIGH);
digitalWrite(LeftMotorSpeed, HIGH);
}
void right()
{
digitalWrite(RightMotorDir, LOW);
digitalWrite(LeftMotorDir, HIGH);
digitalWrite(RightMotorSpeed, HIGH);
digitalWrite(LeftMotorSpeed, HIGH);
}
void left()
{
digitalWrite(RightMotorDir, HIGH);
digitalWrite(LeftMotorDir, LOW);
digitalWrite(RightMotorSpeed, HIGH);
digitalWrite(LeftMotorSpeed, HIGH);
}
BLYNK_WRITE(V0)
{
if (param[0])
forward();
else
halt();
}
BLYNK_WRITE(V1)
{
if (param[0])
reverse();
else
halt();
}
BLYNK_WRITE(V2)
{
if (param[0])
right();
else
halt();
}
BLYNK_WRITE(V3)
{
if (param[0])
left();
else
halt();
}
เลือก Port ในตัวอย่างเป็น "COM12"

เลือก Board : NodeMCU 1.0 (ESP-12E Module)

Upload

ถ้ามีปัญหา Upload ไม่เข้า ขึ้น Error แสดงข้อความว่า ตามรูปภาพ
warning: espcomm_sync failed
error: espcomm_open failed
error: espcomm_upload_mem failed

ให้กดปุ่ม RST 1 ครั้ง และ กดปุ่ม FLASH บนบอร์ด ของ NodeMCU ค้างไว้ ในขณะที่ทำการอัพโหลดโปรแกรม

รอจนกระทั่ง Done uploading. 100%

ภาพรวมการต่อหุ่นยนต์
กลับไปที่ Blynk Application คลิกที่ เครื่องหมาย สามเหลี่ยม เพื่อทดสอบการทำงาน

หน้าต่างควบคุม แอพ robot_car
วีดีโอผลลัพธ์การทำงานของ โปรเจค หุ่นยนต์ ESP8266 NodeMCU V2 ควบคุมด้วย แอพ Blynk
BLOG
โปรเจค Arduino 3 in 1 หรี่ไฟบ้าน 220V ด้วยแอปมือถือ / ด้วยขวดโค๊ก / ด้วยท่าทางมือ
1 ปีที่ผ่านมา
ชุดคิท Arduino 3 in 1 หรี่ไฟบ้าน 220V ด้วย แอปมือถือ / ขวดโค๊ก / ท่าทางมือ (Gestures) การเรียนรู้การสร้างระบบหรี่ไฟบ้าน 220V โดยใช้ Arduino มีข้อดีหลายประการ ดังนี้: พัฒนาทักษะด้านอิเล็กทรอนิกส์: การสร้างระบบนี้ช่วยให้คุณได้ฝึกทักษะการทำงานกับวงจรไฟฟ…
1 ปีที่ผ่านมา
ชุดคิท Arduino 3 in 1 หรี่ไฟบ้าน 220V ด้วย แอปมือถือ / ขวดโค๊ก / ท่าทางมือ (Gestures) การเรียนรู้การสร้างระบบหรี่ไฟบ้าน 220V โดยใช้ Arduino มีข้อดีหลายประการ ดังนี้: พัฒนาทักษะด้านอิเล็กทรอนิกส์: การสร้างระบบนี้ช่วยให้คุณได้ฝึกทักษะการทำงานกับวงจรไฟฟ…
โปรเจค ESP32 เปิด-ปิดไฟบ้าน 220V ผ่านอินเตอร์เน็ต ได้ทั่วโลก ด้วย Blynk 2.0
1 ปีที่ผ่านมา
ชุดคิท IoT ESP32 2 in 1 เปิดปิดไฟ ผ่าน อินเตอร์เน็ต ด้วย BLYNK / ESP Rainmaker Blynk คือ แพลตฟอร์ม IoT ที่ช่วยให้ผู้ใช้สามารถควบคุมและติดตามอุปกรณ์ผ่านอินเทอร์เน็ตได้ง่าย ๆ โดยไม่ต้องเขียนโค้ดซับซ้อน มีแอปพลิเคชันบนสมาร์ทโฟนที่สามารถออกแบบ UI เพื่อคว…
1 ปีที่ผ่านมา
ชุดคิท IoT ESP32 2 in 1 เปิดปิดไฟ ผ่าน อินเตอร์เน็ต ด้วย BLYNK / ESP Rainmaker Blynk คือ แพลตฟอร์ม IoT ที่ช่วยให้ผู้ใช้สามารถควบคุมและติดตามอุปกรณ์ผ่านอินเทอร์เน็ตได้ง่าย ๆ โดยไม่ต้องเขียนโค้ดซับซ้อน มีแอปพลิเคชันบนสมาร์ทโฟนที่สามารถออกแบบ UI เพื่อคว…
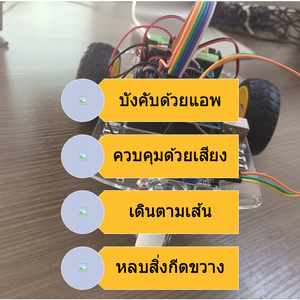
โปรเจค หุ่นยนต์ Arduino 4in1 - บังคับด้วยแอพ / ควบคุมด้วยเสียงปรบมือ / เดินตามเส้น / หลบสิ่งกีดขวาง
1 ปีที่ผ่านมา
ชุดคิท หุ่นยนต์ Arduino 4in1 - บังคับด้วยแอพ / ควบคุมด้วยเสียงปรบมือ / เดินตามเส้น / หลบสิ่งกีดขวาง แบบ DIY (มี ขั้นตอนวิธีทำ และ โค้ด)ชุดคิท หุ่นยนต์ Arduino 4in1 ชุดนี้ สามารถ ทดสอบ ทำโปรเจค ได้หลากหลายรูปแบบ เหมาะสำหรับ โรงเรียน สถานศึกษา ใช้ในการ…
1 ปีที่ผ่านมา
ชุดคิท หุ่นยนต์ Arduino 4in1 - บังคับด้วยแอพ / ควบคุมด้วยเสียงปรบมือ / เดินตามเส้น / หลบสิ่งกีดขวาง แบบ DIY (มี ขั้นตอนวิธีทำ และ โค้ด)ชุดคิท หุ่นยนต์ Arduino 4in1 ชุดนี้ สามารถ ทดสอบ ทำโปรเจค ได้หลากหลายรูปแบบ เหมาะสำหรับ โรงเรียน สถานศึกษา ใช้ในการ…
โปรเจค หุ่นยนต์ ESP8266 3in1 - บังคับผ่าน WIFI / เดินตามเส้น / หลบสิ่งกีดขวาง
1 ปีที่ผ่านมา
ชุดคิท หุ่นยนต์ ESP8266 3in1 - บังคับผ่าน WIFI / เดินตามเส้น / หลบสิ่งกีดขวาง แบบ DIY (มี ขั้นตอนวิธีทำ และ โค้ด)ชุดคิท หุ่นยนต์ ESP8266 V3 3in1 ชุดนี้ สามารถ ทดสอบ ทำโปรเจค ได้หลากหลายรูปแบบ เหมาะสำหรับ โรงเรียน สถานศึกษา ใช้ในการเรียนรู้การสร้างหุ่…
1 ปีที่ผ่านมา
ชุดคิท หุ่นยนต์ ESP8266 3in1 - บังคับผ่าน WIFI / เดินตามเส้น / หลบสิ่งกีดขวาง แบบ DIY (มี ขั้นตอนวิธีทำ และ โค้ด)ชุดคิท หุ่นยนต์ ESP8266 V3 3in1 ชุดนี้ สามารถ ทดสอบ ทำโปรเจค ได้หลากหลายรูปแบบ เหมาะสำหรับ โรงเรียน สถานศึกษา ใช้ในการเรียนรู้การสร้างหุ่…
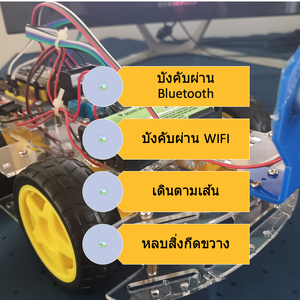
โปรเจค หุ่นยนต์ ESP32 5 in 1 - บังคับผ่าน Bluetooth / บังคับผ่าน WIFI / บังคับผ่านอินเตอร์เน็ต / เดินตามเส้น / หลบสิ่งกีดขวาง
1 ปีที่ผ่านมา
ชุดคิท หุ่นยนต์ ESP32 5 in 1 - บังคับผ่าน Bluetooth / บังคับผ่าน WIFI / บังคับ ผ่านอินเตอร์เน็ต/ เดินตามเส้น / หลบสิ่งกีดขวาง แบบ DIY (มี ขั้นตอนวิธีทำ และ โค้ด)ชุดคิท หุ่นยนต์ ESP32 4in1 ชุดนี้ สามารถ ทดสอบ ทำโปรเจค ได้หลากหลายรูปแบบ เหมาะสำหรับ โรง…
1 ปีที่ผ่านมา
ชุดคิท หุ่นยนต์ ESP32 5 in 1 - บังคับผ่าน Bluetooth / บังคับผ่าน WIFI / บังคับ ผ่านอินเตอร์เน็ต/ เดินตามเส้น / หลบสิ่งกีดขวาง แบบ DIY (มี ขั้นตอนวิธีทำ และ โค้ด)ชุดคิท หุ่นยนต์ ESP32 4in1 ชุดนี้ สามารถ ทดสอบ ทำโปรเจค ได้หลากหลายรูปแบบ เหมาะสำหรับ โรง…
โปรเจค ESP32 เปิด-ปิดไฟ ผ่านอินเตอร์เน็ตด้วย ESP Rainmaker
1 ปีที่ผ่านมา
ESP RainMaker เป็นแพลตฟอร์มที่ช่วยให้นักพัฒนาสร้างอุปกรณ์ที่เชื่อมต่อกับ ESP32-S2 SoC ของ Espressif โดยไม่ต้องวุ่นวายกับการจัดการโครงสร้างพื้นฐาน มี SDK ของอุปกรณ์ แอปโทรศัพท์ที่ปรับเปลี่ยนได้เอง มิดเดิลแวร์คลาวด์แบบโปร่งใส และยูทิลิตีโฮสต์เพื่อลดควา…
1 ปีที่ผ่านมา
ESP RainMaker เป็นแพลตฟอร์มที่ช่วยให้นักพัฒนาสร้างอุปกรณ์ที่เชื่อมต่อกับ ESP32-S2 SoC ของ Espressif โดยไม่ต้องวุ่นวายกับการจัดการโครงสร้างพื้นฐาน มี SDK ของอุปกรณ์ แอปโทรศัพท์ที่ปรับเปลี่ยนได้เอง มิดเดิลแวร์คลาวด์แบบโปร่งใส และยูทิลิตีโฮสต์เพื่อลดควา…
โปรเจค Arduino เปิด-ปิดไฟ ด้วย โทรศัพท์ ผ่าน แอพบลูทูธ
1 ปีที่ผ่านมา
โปรเจค Arduino: เปิด-ปิดไฟด้วย โทรศัพท์ ผ่าน แอพบลูทูธ การควบคุมการเปิด-ปิดไฟในบ้านหรือสถานที่ต่าง ๆ ได้ง่ายขึ้นด้วยการใช้ Arduino ร่วมกับบลูทูธ. ในบทความนี้, เราจะสร้างโปรเจคที่ใช้ Arduino เพื่อควบคุมไฟผ่านแอพบลูทูธบนโทรศัพท์มือถือของเรา. การทำโปรเจ…
1 ปีที่ผ่านมา
โปรเจค Arduino: เปิด-ปิดไฟด้วย โทรศัพท์ ผ่าน แอพบลูทูธ การควบคุมการเปิด-ปิดไฟในบ้านหรือสถานที่ต่าง ๆ ได้ง่ายขึ้นด้วยการใช้ Arduino ร่วมกับบลูทูธ. ในบทความนี้, เราจะสร้างโปรเจคที่ใช้ Arduino เพื่อควบคุมไฟผ่านแอพบลูทูธบนโทรศัพท์มือถือของเรา. การทำโปรเจ…
โปรเจค Arduino ไฟฟ้าจากผลไม้ กับ หลอดไฟ 220 โวลต์
1 ปีที่ผ่านมา
สอนทำโปรเจค Arduino ไฟฟ้าจากผลไม้ กับ หลอดไฟ 220 โวลต์ "ทดลองไฟฟ้าจากผลไม้" เป็นการทดลองทางวิทยาศาสตร์ที่น่าสนใจเพื่อศึกษาและทดสอบกระบวนการผลิตไฟฟ้าโดยใช้มันฝรั่งในฐานะวัตถุดิบหลัก. การทดลองนี้มุ่งเน้นการเรียนรู้และทำความเข้าใจถึงพลังงานที่เกิดขึ้นจา…
1 ปีที่ผ่านมา
สอนทำโปรเจค Arduino ไฟฟ้าจากผลไม้ กับ หลอดไฟ 220 โวลต์ "ทดลองไฟฟ้าจากผลไม้" เป็นการทดลองทางวิทยาศาสตร์ที่น่าสนใจเพื่อศึกษาและทดสอบกระบวนการผลิตไฟฟ้าโดยใช้มันฝรั่งในฐานะวัตถุดิบหลัก. การทดลองนี้มุ่งเน้นการเรียนรู้และทำความเข้าใจถึงพลังงานที่เกิดขึ้นจา…
มินิโปรเจค Arduino วัดก๊าซคาร์บอนไดออกไซด์ แสดงผลที่จอ LCD
4 ปีที่ผ่านมา
ระดับคาร์บอนไดออกไซด์ปกติ (Normal CO2 Levels) ระดับคาร์บอนไดออกไซด์ปกติผลกระทบของ CO2 ต่อผู้ใหญ่ที่มีสุขภาพที่ดีสามารถสรุปได้ดังนี้-ระดับกลางแจ้งปกติ: 350 – 450 ppm-ระดับที่ยอมรับได้: <600 ppm=”” span=””>-ข้อร้องเร…
4 ปีที่ผ่านมา
ระดับคาร์บอนไดออกไซด์ปกติ (Normal CO2 Levels) ระดับคาร์บอนไดออกไซด์ปกติผลกระทบของ CO2 ต่อผู้ใหญ่ที่มีสุขภาพที่ดีสามารถสรุปได้ดังนี้-ระดับกลางแจ้งปกติ: 350 – 450 ppm-ระดับที่ยอมรับได้: <600 ppm=”” span=””>-ข้อร้องเร…
มินิโปรเจค Arduino เครื่องวัดฝุ่น PM2.5 ด้วย เซ็นเซอร์ GP2Y1014AU
4 ปีที่ผ่านมา
เครื่องวัดฝุ่น PM2.5 ด้วย เซ็นเซอร์ GP2Y1014AU บทความนี้ กล่าวถึงขั้นตอนการทำงานโปรเจค เครื่องวัดฝุ่น PM2.5 กับ Arduino UNO โดยใช้ เซ็นเซอร์วัดฝุ่น PM2.5 Keyestudio GP2Y1014AU ของ Sharp เซ็นเซอร์ฝุ่นนี้มีขนาดเล็กและสามารถตรวจจับฝุ่นละอองและอนุภาคควัน…
4 ปีที่ผ่านมา
เครื่องวัดฝุ่น PM2.5 ด้วย เซ็นเซอร์ GP2Y1014AU บทความนี้ กล่าวถึงขั้นตอนการทำงานโปรเจค เครื่องวัดฝุ่น PM2.5 กับ Arduino UNO โดยใช้ เซ็นเซอร์วัดฝุ่น PM2.5 Keyestudio GP2Y1014AU ของ Sharp เซ็นเซอร์ฝุ่นนี้มีขนาดเล็กและสามารถตรวจจับฝุ่นละอองและอนุภาคควัน…
มินิโปรเจค Arduino หรี่ไฟ AC 220V ผ่านบลูทูธ ด้วย App Android
5 ปีที่ผ่านมา
หรี่ไฟ AC 220V ผ่านบลูทูธ ด้วย App Android เป้าหมายและหลักการทำงานของโปรเจค ต้องการหรี่ไฟ หรือควบคุมแสงสว่างของหลอดไฟหรืออุปกรณ์ไฟฟ้าอื่นๆ แบบไร้สายผ่านโทรศัพท์มือถือด้วยแอพแอนดรอยด์ (App Android) เพื่อเป็นการประหยัดพลังงาน และความสะดวกในการควบคุม ซึ…
5 ปีที่ผ่านมา
หรี่ไฟ AC 220V ผ่านบลูทูธ ด้วย App Android เป้าหมายและหลักการทำงานของโปรเจค ต้องการหรี่ไฟ หรือควบคุมแสงสว่างของหลอดไฟหรืออุปกรณ์ไฟฟ้าอื่นๆ แบบไร้สายผ่านโทรศัพท์มือถือด้วยแอพแอนดรอยด์ (App Android) เพื่อเป็นการประหยัดพลังงาน และความสะดวกในการควบคุม ซึ…
มินิโปรเจค สร้างเกม Endless Runner ด้วย Arduino และ จอ LCD
5 ปีที่ผ่านมา
มินิโปรเจค สร้างเกม Endless Runner ด้วย Arduino และ จอ LCD การสร้างเกม ก็คือการเขียนโปรแกรมแบบหนึ่ง ให้แสดงผลถี่ๆ แล้วเขียนโปรแกรมให้การแสดงผลในแต่ละครั้ง ค่อยๆทำให้ตัวละครในภาพค่อยๆขยับ โดยการทำการเปลี่ยนภาพ หรือเคลื่อนที่ตัวละคร ก็จะเกิดการเคลื่อนไ…
5 ปีที่ผ่านมา
มินิโปรเจค สร้างเกม Endless Runner ด้วย Arduino และ จอ LCD การสร้างเกม ก็คือการเขียนโปรแกรมแบบหนึ่ง ให้แสดงผลถี่ๆ แล้วเขียนโปรแกรมให้การแสดงผลในแต่ละครั้ง ค่อยๆทำให้ตัวละครในภาพค่อยๆขยับ โดยการทำการเปลี่ยนภาพ หรือเคลื่อนที่ตัวละคร ก็จะเกิดการเคลื่อนไ…
โปรเจค IoT ESP8266 วัดอุณหภูมิ บันทึกลงดาต้าเบส MySQL
5 ปีที่ผ่านมา
เป้าหมายของโปรเจคนี้คือเราต้องดูข้อมูลด้วยการเข้าถึงโดเมน ของเราเอง ไม่ว่าจะอยู่ส่วนไหนของโลก โดย ESP8266 จะสร้างไคลเอ็นต์ ที่ทำให้คำขอ HTTP POST ไปยังสคริปต์ PHP เพื่อแทรกข้อมูล (การอ่านเซ็นเซอร์) ลงในฐานข้อมูล MySQLโดยบทความนี้จะแสดงการส่งข้อมูลจาก…
5 ปีที่ผ่านมา
เป้าหมายของโปรเจคนี้คือเราต้องดูข้อมูลด้วยการเข้าถึงโดเมน ของเราเอง ไม่ว่าจะอยู่ส่วนไหนของโลก โดย ESP8266 จะสร้างไคลเอ็นต์ ที่ทำให้คำขอ HTTP POST ไปยังสคริปต์ PHP เพื่อแทรกข้อมูล (การอ่านเซ็นเซอร์) ลงในฐานข้อมูล MySQLโดยบทความนี้จะแสดงการส่งข้อมูลจาก…
มินิโปรเจค Arduino เปิดปิดไฟ 220V และ หรี่ไฟบ้านด้วยเสียง
5 ปีที่ผ่านมา
ควบคุมการติด-ดับ และ หรี่แสงสว่างหลอดไฟด้วยเสียงปรบมือ แนะนำ : ชุดประกอบสำเร็จ Arduino ควบคุมการติด-ดับ และ หรี่แสงสว่างหลอดไฟด้วยเสียงปรบมือ การทำ มินิโปรเจค Arduino เปิดปิดไฟ 220V และ หรี่ไฟบ้านด้วยเสียง เป้าหมายและหลักการทำงานของโปรเจค ต้องการควบค…
5 ปีที่ผ่านมา
ควบคุมการติด-ดับ และ หรี่แสงสว่างหลอดไฟด้วยเสียงปรบมือ แนะนำ : ชุดประกอบสำเร็จ Arduino ควบคุมการติด-ดับ และ หรี่แสงสว่างหลอดไฟด้วยเสียงปรบมือ การทำ มินิโปรเจค Arduino เปิดปิดไฟ 220V และ หรี่ไฟบ้านด้วยเสียง เป้าหมายและหลักการทำงานของโปรเจค ต้องการควบค…
โปรเจค ESP32-CAM กล้องดักถ่ายภาพอัตโนมัติ ด้วย PIR Motion
5 ปีที่ผ่านมา
โปรเจค ESP32-CAM กล้องดักถ่ายภาพอัตโนมัติ ด้วย PIR Motion โดยโปรเจคนี้ สามารถประยุกต์เป็นกล้องดักถ่ายภาพเมื่อมีผู้บุกรุก หรือเป็นกล้องดักถ่ายภาพสัตว์ มีชื่อเรียกหลายชื่อได้แก่ Trail Cam, Scout Cam, Camera Trap โดยผู้ใช้งานโดยซ่อนไว้ใกล้บริเวณทางที่สั…
5 ปีที่ผ่านมา
โปรเจค ESP32-CAM กล้องดักถ่ายภาพอัตโนมัติ ด้วย PIR Motion โดยโปรเจคนี้ สามารถประยุกต์เป็นกล้องดักถ่ายภาพเมื่อมีผู้บุกรุก หรือเป็นกล้องดักถ่ายภาพสัตว์ มีชื่อเรียกหลายชื่อได้แก่ Trail Cam, Scout Cam, Camera Trap โดยผู้ใช้งานโดยซ่อนไว้ใกล้บริเวณทางที่สั…
มินิโปรเจค Arduino อ่านค่าสี เล่นไฟล์เสียงจาก SD Card ออกลำโพง
5 ปีที่ผ่านมา
มินิโปรเจค Arduino อ่านค่าสี เล่นไฟล์เสียงจาก SD Card ออกลำโพง โปรเจค Arduino พูดโต้ตอบได้ โดยการเล่นไฟล์เสียงจาก SD Card บทความนี้จะสอนใช้งาน Arduino เล่นไฟล์เสียงจาก SD Card ออกลำโพง เราสามารถอัดเสียงพูดหรือบันทึกเสียงเพลงลง SD Card แล้ว สั่งงานให้…
5 ปีที่ผ่านมา
มินิโปรเจค Arduino อ่านค่าสี เล่นไฟล์เสียงจาก SD Card ออกลำโพง โปรเจค Arduino พูดโต้ตอบได้ โดยการเล่นไฟล์เสียงจาก SD Card บทความนี้จะสอนใช้งาน Arduino เล่นไฟล์เสียงจาก SD Card ออกลำโพง เราสามารถอัดเสียงพูดหรือบันทึกเสียงเพลงลง SD Card แล้ว สั่งงานให้…
 โรบอทสยาม อุปกรณ์หุ่นยนต์ Arduino
{{is_joined?'เป็นสมาชิกแล้ว':'Join เป็นสมาชิกร้าน'}}
299
สมัครสมาชิกร้านนี้ เพื่อรับสิทธิพิเศษ
ร้านค้าออนไลน์
Inspired by
LnwShop.com (v2)
▲
▼
รายการสั่งซื้อของฉัน
รายการสั่งซื้อของฉัน
ข้อมูลร้านค้านี้

โรบอทสยาม อุปกรณ์หุ่นยนต์ Arduino
จําหน่าย อุปกรณ์หุ่นยนต์ Arduino , ESP8266, ESP32 , STM32 , micro:bit , Paspberry Pi รับประกอบหุ่นยนต์ ชุดคิทหุ่นยนต์ ตัวอย่างโปรเจค IoT (Internet of Things) อินเทอร์เน็ตของสรรพสิ่ง
เบอร์โทร : 095-226-2116
อีเมล : robotsiam16@gmail.com
อีเมล : robotsiam16@gmail.com
ส่งข้อความติดต่อร้าน
เกี่ยวกับร้านค้านี้
ค้นหาสินค้าในร้านนี้
ค้นหาสินค้า
สินค้าที่ดูล่าสุด
บันทึกเป็นร้านโปรด
Join เป็นสมาชิกร้าน
แชร์หน้านี้
แชร์หน้านี้
↑
TOP เลื่อนขึ้นบนสุด
TOP เลื่อนขึ้นบนสุด
คุณมีสินค้า 0 ชิ้นในตะกร้า สั่งซื้อทันที
สินค้าในตะกร้า ({{total_num}} รายการ)

ขออภัย ขณะนี้ยังไม่มีสินค้าในตะกร้า
ราคาสินค้าทั้งหมด
฿ {{price_format(total_price)}}
- ฿ {{price_format(discount.price)}}
ราคาสินค้าทั้งหมด
{{total_quantity}} ชิ้น
฿ {{price_format(after_product_price)}}
ราคาไม่รวมค่าจัดส่ง
➜ เลือกซื้อสินค้าเพิ่ม


