โปรเจค หุ่นยนต์ติดตามวัตถุ Raspberry Pi + OpenCV
6 ปีที่ผ่านมา

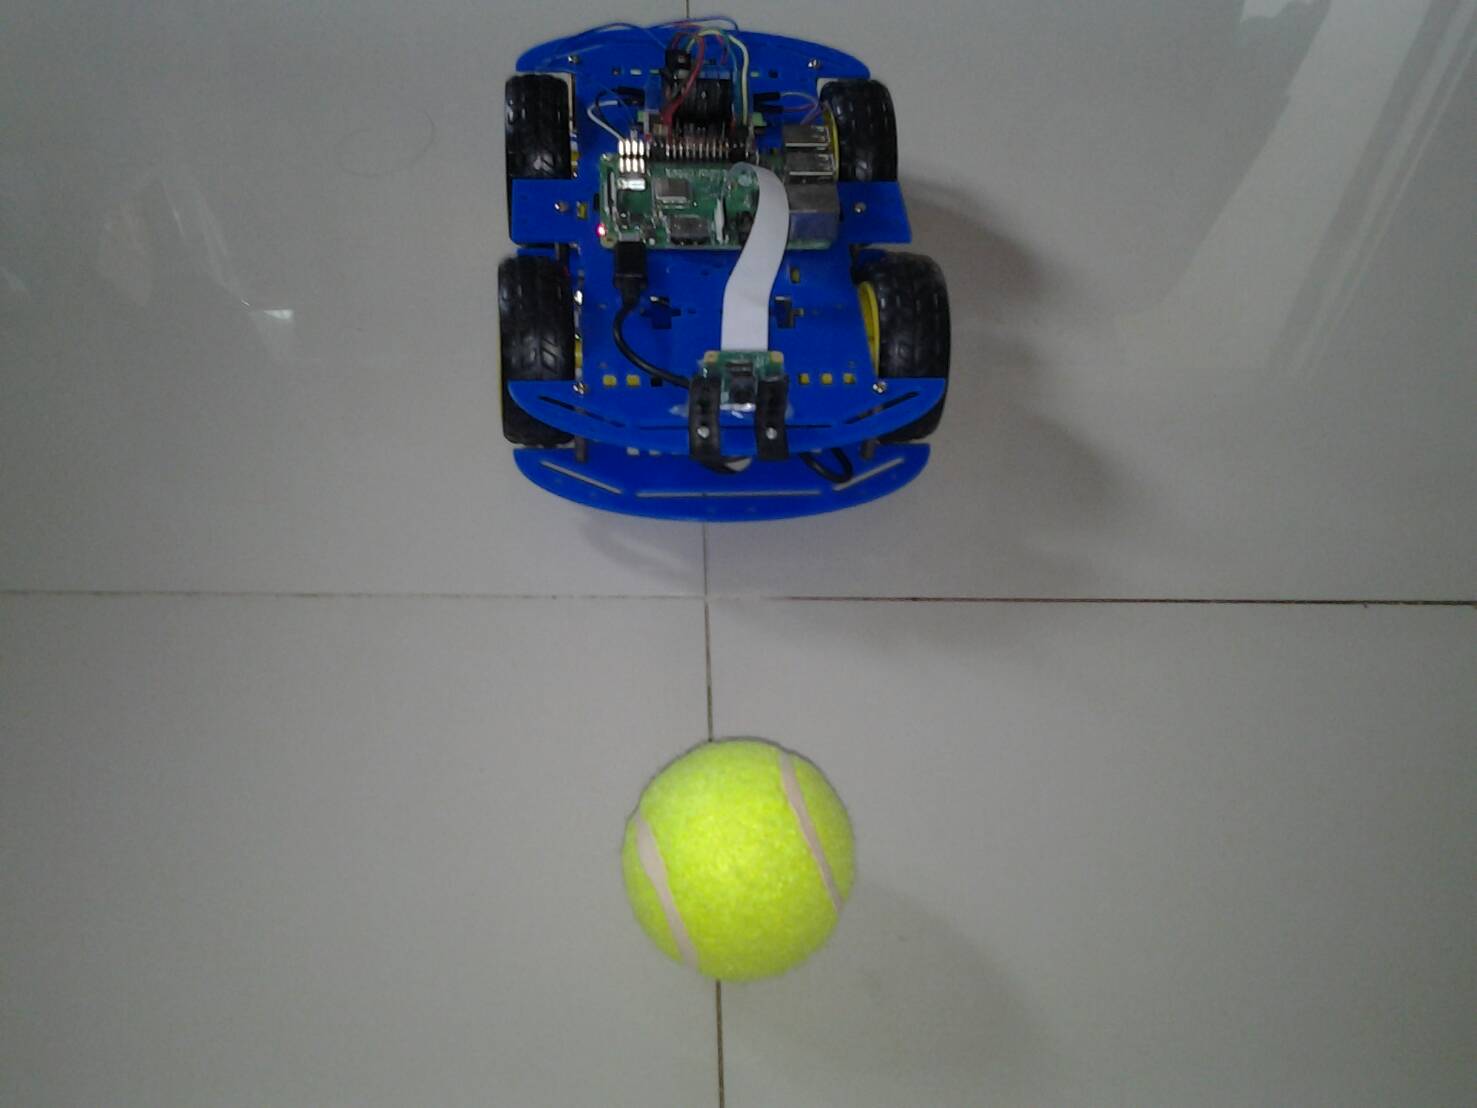
โปรเจคหุ่นยนต์ติดตามวัตถุ Raspberry Pi + OpenCV โปรเจคนี้จะทำหุ่นยนต์ติดตามวัตถุ จากการถ่ายภาพของ Camera V2 Module โดยใช้ลูกบอลสีเหลือง ในตัวอย่างใช้เป็นลูกเทนนิสเป็นวัตถุ แล้วให้หุ่นยนต์ติดตามวัตถุนั้น
อุปกรณ์ที่ใช้
11. สกรูหัวกลม+น็อตตัวเมีย ขนาด 2.6 มม. ยาว 10 มม
12. Power Bank 20000 mAh USB Output DC 5V/2.1A
13. Camera V2 Module 8MP
14. พลาสติกเจาะรูแนวตั้ง รูปตัว L ขนาด 10 x 20 mm
อุปกรณ์ที่ใช้
8. เพาเวอร์สวิตซ์สำหรับเปิดปิด
9. รางถ่าน 18650 3 ก้อน
10 . ถ่านชาร์จ 18650 Panasonic NCR18650B 3.7v 3400mAh จำนวน 3 ก้อน
9. รางถ่าน 18650 3 ก้อน
10 . ถ่านชาร์จ 18650 Panasonic NCR18650B 3.7v 3400mAh จำนวน 3 ก้อน
11. สกรูหัวกลม+น็อตตัวเมีย ขนาด 2.6 มม. ยาว 10 มม
12. Power Bank 20000 mAh USB Output DC 5V/2.1A
13. Camera V2 Module 8MP
14. พลาสติกเจาะรูแนวตั้ง รูปตัว L ขนาด 10 x 20 mm
ขั้นตอนการทำงาน
1. การติดตั้ง Linux ให้กับ Raspberry โดยใช้ไฟล์ image
2. การใช้งาน GPIO ใน Raspberry Pi ด้วย Python
3. การประกอบหุ่นยนต์ Raspberry Pi
4. วิธีเปิดใช้งาน Remote Desktop ไปยัง Raspberry Pi
5. ทดสอบการเคลื่อนที่ของหุ่นยนต์ Raspberry Pi
6. การติดตั้ง OpenCV 3 และการติดตามวัตถุ
7. โปรเจค หุ่นยนต์ติดตามวัตถุ Raspberry Pi + OpenCV
7.1 การตรวจหาสีของ Raspberry Pi และ OpenCV
โดยปกติแล้วกล้องของเราจะทำงานร่วมกับโหมดสี RGB ซึ่งสามารถเข้าใจได้โดยคิดว่าเป็นสีที่เป็นไปได้ทั้งหมดซึ่งสามารถทำได้จากไฟสามสีสำหรับสีแดงเขียวและน้ำเงิน แต่เราจะทำงานกับ BGR (สีฟ้า, สีเขียว, สีแดง) แทน
ตามที่อธิบายไว้ด้านบน BGR มีพิกเซลแสดงด้วยพารามิเตอร์ 3 สีฟ้าสีเขียวและสีแดง พารามิเตอร์แต่ละตัวมักมีค่าตั้งแต่ 0 ถึง 255 (หรือ O ถึง FF ในเลขฐานสิบหก) ตัวอย่างเช่นพิกเซลสีน้ำเงินบริสุทธิ์บนหน้าจอคอมพิวเตอร์ของคุณจะมีค่า B 255 ค่าของ G เท่ากับ 0 และค่า R เท่ากับ 0

OpenCV ทำงานร่วมกับรูปแบบสี HSV (Hue, Saturation, Value) ที่เป็นตัวแทนทางเลือกของรูปแบบสี RGB ซึ่งออกแบบโดยนักวิจัยกราฟิกคอมพิวเตอร์ในยุค 70 ให้สอดคล้องกับวิสัยทัศน์ของมนุษย์มากขึ้นในการรับรู้คุณลักษณะของสี
ดังนั้นถ้าต้องการติดตามสีบางอย่างโดยใช้ OpenCV ต้องกำหนดโดยใช้ HSV Model
สมมติว่าต้องติดตามวัตถุสีเหลืองเป็นลูกเทนนิสที่แสดงภาพข้างต้น ที่ง่ายก็คือการหาองค์ประกอบของ BGR โดยสามารถใช้โปรแกรมออกแบบใด ๆ เพื่อค้นหาสี เช่น โปรแกรม Photoshop
1. เลือกไปที่สี ที่ต้องการ เช่นสีของลูกเทนนิส
2. คลิกเพื่อดูค่าสี
3. แสดงค่าสี BRG

จะได้โมเดลแบบ BGR คือ
Blue: 51
Green: 254
Red: 237
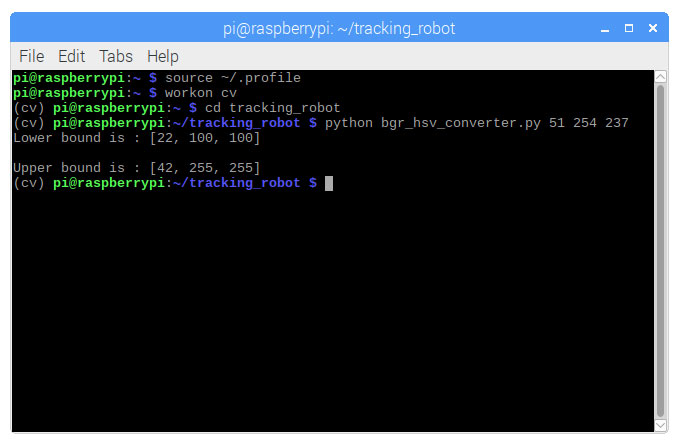
ต่อไปเราต้องแปลงโมเดล BGR (51, 254, 237) ให้เป็นแบบ HSV ซึ่งจะกำหนดด้วยขอบเขตบนและล่าง จากนั้นให้เรียกใช้โค้ดด้านล่าง โดยมีขั้นตอนดังนี้
เปิดโปรแกรม เทอมินอล (Root Terminal)
สร้างโฟลเดอร์ tracking_robot โดยใช้คำสั่ง
mkdir tracking_robot
เปิดโปรแกรม Python 3 (IDLE) เขียนโค้ดดังนี้
'''
BGR to HSV Color Conversion
Create by Henry Dang ==> See the tutorial here:
https://henrydangprg.com/2016/06/26/color-detection-in-python-with-opencv/
Adapted by Marcelo Rovai - MJRoBot.org @8Feb18
'''
import sys
import numpy as np
import cv2
blue = sys.argv[1]
green = sys.argv[2]
red = sys.argv[3]
color = np.uint8([[[blue, green, red]]])
hsv_color = cv2.cvtColor(color, cv2.COLOR_BGR2HSV)
hue = hsv_color[0][0][0]
print("Lower bound is :"),
print("[" + str(hue-10) + ", 100, 100]\n")
print("Upper bound is :"),
print("[" + str(hue + 10) + ", 255, 255]")
หรือดาวน์โหลดโค้ดจากลิงค์ด้านล่าง
https://github.com/Mjrovai/OpenCV-Object-Face-Tracking/blob/master/bgr_hsv_converter.py
Save ไปที่ โฟลเดอร์ tracking_robot และตั้งชื่อเป็น bgr_hsv_converter.py
การทดสอบต้องมีสภาพแวดล้อมแบบเสมือนของ OpenCV คือ ต้องเห็นข้อความ (cv) ก่อนหน้าพร้อมท์
โดยใช้คำสั่ง
source ~/.profile
workon cv
cd tracking_robot
python bgr_hsv_converter.py 51 254 237
.

โปรแกรมจะพิมพ์ขอบด้านบนและด้านล่างของสีวัตถุของเรา ซึ่งเราจะใช้ค่านี้ไปเขียนโค้ด หุ่นยนต์ติดตามวัตถุ ที่ colorLower และ colorUpper ต่อไป
7.2 เขียนโค้ด หุ่นยนต์ติดตามวัตถุ
เปิดโปรแกรม Python 3 (IDLE) เขียนโค้ดดังนี้
#######
# Author: RobotSiam.com
# Date: 22 September 2018
#######
# import the necessary packages
from __future__ import print_function
from imutils.video import VideoStream
import argparse
import imutils
import time
import cv2
import os
import RPi.GPIO as GPIO
#set GPIO numbering mode and define output pins
GPIO.setmode(GPIO.BOARD)
GPIO.setwarnings(False)
GPIO.setup(11,GPIO.OUT)
GPIO.setup(13,GPIO.OUT)
GPIO.setup(35,GPIO.OUT)
GPIO.setup(37,GPIO.OUT)
def forWard():
print("Going Forwards")
GPIO.output(11,True)
GPIO.output(13,False)
GPIO.output(35,True)
GPIO.output(37,False)
time.sleep(0.1)
GPIO.output(11,False)
GPIO.output(13,False)
GPIO.output(35,False)
GPIO.output(37,False)
def backWard():
print("Going Backwards")
GPIO.output(11,False)
GPIO.output(13,True)
GPIO.output(35,False)
GPIO.output(37,True)
time.sleep(0.1)
GPIO.output(11,False)
GPIO.output(13,False)
GPIO.output(35,False)
GPIO.output(37,False)
def turnRight():
print("Going Right")
GPIO.output(11,False)
GPIO.output(13,False)
GPIO.output(35,True)
GPIO.output(37,False)
time.sleep(0.1)
GPIO.output(11,False)
GPIO.output(13,False)
GPIO.output(35,False)
GPIO.output(37,False)
def turnLeft():
print("Going Left")
GPIO.output(11,True)
GPIO.output(13,False)
GPIO.output(35,False)
GPIO.output(37,False)
time.sleep(0.1)
GPIO.output(11,False)
GPIO.output(13,False)
GPIO.output(35,False)
GPIO.output(37,False)
def Stop():
print("Stopping")
GPIO.output(11,False)
GPIO.output(13,False)
GPIO.output(35,False)
GPIO.output(37,False)
# position servos to present object at center of the frame
def mapPosition (x, y):
if (x < 200):
turnLeft()
elif (x > 300):
turnRight()
elif (x >= 200 and x <= 300):
forWard()
# initialize the video stream and allow the camera sensor to warmup
print("[INFO] waiting for camera to warmup...")
vs = VideoStream(0).start()
time.sleep(2.0)
# define the lower and upper boundaries of the object
# to be tracked in the HSV color space
colorLower = (22, 100, 100)
colorUpper = (42, 255, 255)
# loop over the frames from the video stream
while True:
# grab the next frame from the video stream, Invert 180o, resize the
# frame, and convert it to the HSV color space
frame = vs.read()
frame = imutils.resize(frame, width=500)
frame = imutils.rotate(frame, angle=0)
hsv = cv2.cvtColor(frame, cv2.COLOR_BGR2HSV)
# construct a mask for the object color, then perform
# a series of dilations and erosions to remove any small
# blobs left in the mask
mask = cv2.inRange(hsv, colorLower, colorUpper)
mask = cv2.erode(mask, None, iterations=2)
mask = cv2.dilate(mask, None, iterations=2)
# find contours in the mask and initialize the current
# (x, y) center of the object
cnts = cv2.findContours(mask.copy(), cv2.RETR_EXTERNAL,
cv2.CHAIN_APPROX_SIMPLE)
cnts = cnts[0] if imutils.is_cv2() else cnts[1]
center = None
# only proceed if at least one contour was found
if len(cnts) > 0:
# find the largest contour in the mask, then use
# it to compute the minimum enclosing circle and
# centroid
c = max(cnts, key=cv2.contourArea)
((x, y), radius) = cv2.minEnclosingCircle(c)
M = cv2.moments(c)
center = (int(M["m10"] / M["m00"]), int(M["m01"] / M["m00"]))
# only proceed if the radius meets a minimum size
if radius > 10:
# draw the circle and centroid on the frame,
# then update the list of tracked points
cv2.circle(frame, (int(x), int(y)), int(radius),
(0, 255, 255), 2)
cv2.circle(frame, center, 5, (0, 0, 255), -1)
# position Servo at center of circle
mapPosition(int(x), int(y))
# show the frame to our screen
cv2.imshow("Frame", frame)
# if [ESC] key is pressed, stop the loop
key = cv2.waitKey(1) & 0xFF
if key == ord("q"):
break
# do a bit of cleanup
print("\n [INFO] Exiting Program and cleanup stuff \n")
Stop()
GPIO.cleanup()
cv2.destroyAllWindows()
vs.stop()
หรือดาวน์โหลดโค้ดจากลิงค์ด้านล่าง
https://drive.google.com/open?id=1vS7fyTyQcsKD5ECAk4a3dcjlPopU2Q0S
Save ไปที่ โฟลเดอร์ tracking_robot และตั้งชื่อเป็น following_robot.py
7.3 ทดสอบการทำงาน หุ่นยนต์ติดตามวัตถุ
เสียบสาย USB ของ Power Bank ต่อเข้ากับ 5V Micro USB ของบอร์ด Raspberry Pi ยังไม่ต้องเปิดเพาเวอร์สวิตซ์ ของ Motor Driver
การทดสอบต้องมีสภาพแวดล้อมแบบเสมือนของ OpenCV คือ ต้องเห็นข้อความ (cv) ก่อนหน้าพร้อมท์
ทดสอบการติดตามวัตถุของหุ่นยนต์โดยใช้คำสั่ง
source ~/.profile
workon cv
cd tracking_robot
cd tracking_robot
python following_robot.py

โปรแกรมเริ่มทำงาน

การตัดสินใจของหุ่นยนต์มีดังนี้
x 0 , y 0 ของ หน้าจอภาพ Frame อยู่ที่มุมขวา-ล่าง
x >= 200 and x <= 300 วัดจากหน้าจอภาพ Frame เมื่อ x อยู่ระหว่าง 200 ถึง 300 พิกเซล ให้หุ่นยนต์ตรงไป

x < 200 วัดจากหน้าจอภาพ Frame เมื่อ x น้อยกว่า 200 พิกเซล ให้หุ่นยนต์เลี้ยวซ้าย
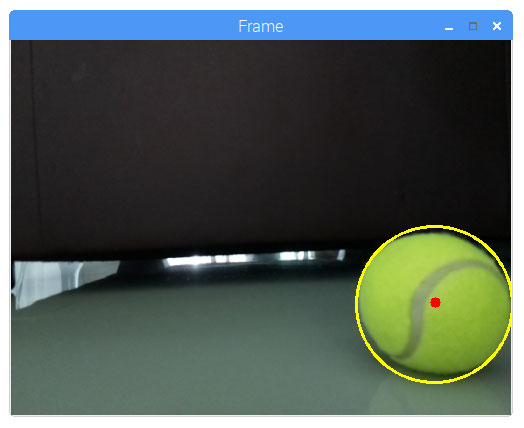
x > 300 วัดจากหน้าจอภาพ Frame เมื่อ x มากกว่า 300 พิกเซล ให้หุ่นยนต์เลี้ยวขวา

เปิด เพาเวอร์สวิตซ์ จะมีไฟสีแดงติดที่ Motor Driver
ทดสอบการทำงาน
กด Q ถ้าต้องการออกจากโปรแกรม หรือ กด Ctrl + C เพื่อออกจากโปรแกรม
วีดีโอผลลัพธ์การทำงานของ โปรเจค หุ่นยนต์ติดตามวัตถุ Raspberry Pi + OpenCV
วีดีโอผลลัพธ์การทำงานของ โปรเจค หุ่นยนต์ติดตามวัตถุ Raspberry Pi + OpenCV
หมายเหตุ : เรียบเรียงและแก้ไขดัดแปลงจากบทความด้านล่าง
AUTOMATIC VISION OBJECT TRACKING

BLOG

โปรเจค Arduino 3 in 1 หรี่ไฟบ้าน 220V ด้วยแอปมือถือ / ด้วยขวดโค๊ก / ด้วยท่าทางมือ
1 ปีที่ผ่านมา
ชุดคิท Arduino 3 in 1 หรี่ไฟบ้าน 220V ด้วย แอปมือถือ / ขวดโค๊ก / ท่าทางมือ (Gestures) การเรียนรู้การสร้างระบบหรี่ไฟบ้าน 220V โดยใช้ Arduino มีข้อดีหลายประการ ดังนี้: พัฒนาทักษะด้านอิเล็กทรอนิกส์: การสร้างระบบนี้ช่วยให้คุณได้ฝึกทักษะการทำงานกับวงจรไฟฟ…
1 ปีที่ผ่านมา
ชุดคิท Arduino 3 in 1 หรี่ไฟบ้าน 220V ด้วย แอปมือถือ / ขวดโค๊ก / ท่าทางมือ (Gestures) การเรียนรู้การสร้างระบบหรี่ไฟบ้าน 220V โดยใช้ Arduino มีข้อดีหลายประการ ดังนี้: พัฒนาทักษะด้านอิเล็กทรอนิกส์: การสร้างระบบนี้ช่วยให้คุณได้ฝึกทักษะการทำงานกับวงจรไฟฟ…
โปรเจค ESP32 เปิด-ปิดไฟบ้าน 220V ผ่านอินเตอร์เน็ต ได้ทั่วโลก ด้วย Blynk 2.0
1 ปีที่ผ่านมา
ชุดคิท IoT ESP32 2 in 1 เปิดปิดไฟ ผ่าน อินเตอร์เน็ต ด้วย BLYNK / ESP Rainmaker Blynk คือ แพลตฟอร์ม IoT ที่ช่วยให้ผู้ใช้สามารถควบคุมและติดตามอุปกรณ์ผ่านอินเทอร์เน็ตได้ง่าย ๆ โดยไม่ต้องเขียนโค้ดซับซ้อน มีแอปพลิเคชันบนสมาร์ทโฟนที่สามารถออกแบบ UI เพื่อคว…
1 ปีที่ผ่านมา
ชุดคิท IoT ESP32 2 in 1 เปิดปิดไฟ ผ่าน อินเตอร์เน็ต ด้วย BLYNK / ESP Rainmaker Blynk คือ แพลตฟอร์ม IoT ที่ช่วยให้ผู้ใช้สามารถควบคุมและติดตามอุปกรณ์ผ่านอินเทอร์เน็ตได้ง่าย ๆ โดยไม่ต้องเขียนโค้ดซับซ้อน มีแอปพลิเคชันบนสมาร์ทโฟนที่สามารถออกแบบ UI เพื่อคว…

โปรเจค หุ่นยนต์ Arduino 4in1 - บังคับด้วยแอพ / ควบคุมด้วยเสียงปรบมือ / เดินตามเส้น / หลบสิ่งกีดขวาง
1 ปีที่ผ่านมา
ชุดคิท หุ่นยนต์ Arduino 4in1 - บังคับด้วยแอพ / ควบคุมด้วยเสียงปรบมือ / เดินตามเส้น / หลบสิ่งกีดขวาง แบบ DIY (มี ขั้นตอนวิธีทำ และ โค้ด)ชุดคิท หุ่นยนต์ Arduino 4in1 ชุดนี้ สามารถ ทดสอบ ทำโปรเจค ได้หลากหลายรูปแบบ เหมาะสำหรับ โรงเรียน สถานศึกษา ใช้ในการ…
1 ปีที่ผ่านมา
ชุดคิท หุ่นยนต์ Arduino 4in1 - บังคับด้วยแอพ / ควบคุมด้วยเสียงปรบมือ / เดินตามเส้น / หลบสิ่งกีดขวาง แบบ DIY (มี ขั้นตอนวิธีทำ และ โค้ด)ชุดคิท หุ่นยนต์ Arduino 4in1 ชุดนี้ สามารถ ทดสอบ ทำโปรเจค ได้หลากหลายรูปแบบ เหมาะสำหรับ โรงเรียน สถานศึกษา ใช้ในการ…
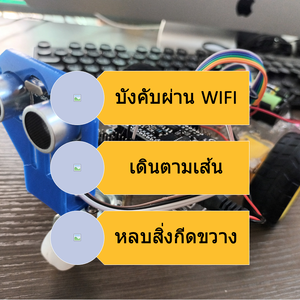
โปรเจค หุ่นยนต์ ESP8266 3in1 - บังคับผ่าน WIFI / เดินตามเส้น / หลบสิ่งกีดขวาง
1 ปีที่ผ่านมา
ชุดคิท หุ่นยนต์ ESP8266 3in1 - บังคับผ่าน WIFI / เดินตามเส้น / หลบสิ่งกีดขวาง แบบ DIY (มี ขั้นตอนวิธีทำ และ โค้ด)ชุดคิท หุ่นยนต์ ESP8266 V3 3in1 ชุดนี้ สามารถ ทดสอบ ทำโปรเจค ได้หลากหลายรูปแบบ เหมาะสำหรับ โรงเรียน สถานศึกษา ใช้ในการเรียนรู้การสร้างหุ่…
1 ปีที่ผ่านมา
ชุดคิท หุ่นยนต์ ESP8266 3in1 - บังคับผ่าน WIFI / เดินตามเส้น / หลบสิ่งกีดขวาง แบบ DIY (มี ขั้นตอนวิธีทำ และ โค้ด)ชุดคิท หุ่นยนต์ ESP8266 V3 3in1 ชุดนี้ สามารถ ทดสอบ ทำโปรเจค ได้หลากหลายรูปแบบ เหมาะสำหรับ โรงเรียน สถานศึกษา ใช้ในการเรียนรู้การสร้างหุ่…
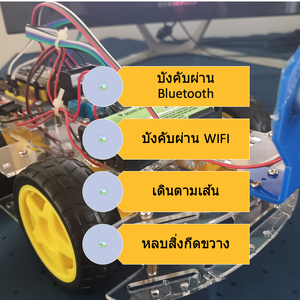
โปรเจค หุ่นยนต์ ESP32 5 in 1 - บังคับผ่าน Bluetooth / บังคับผ่าน WIFI / บังคับผ่านอินเตอร์เน็ต / เดินตามเส้น / หลบสิ่งกีดขวาง
1 ปีที่ผ่านมา
ชุดคิท หุ่นยนต์ ESP32 5 in 1 - บังคับผ่าน Bluetooth / บังคับผ่าน WIFI / บังคับ ผ่านอินเตอร์เน็ต/ เดินตามเส้น / หลบสิ่งกีดขวาง แบบ DIY (มี ขั้นตอนวิธีทำ และ โค้ด)ชุดคิท หุ่นยนต์ ESP32 4in1 ชุดนี้ สามารถ ทดสอบ ทำโปรเจค ได้หลากหลายรูปแบบ เหมาะสำหรับ โรง…
1 ปีที่ผ่านมา
ชุดคิท หุ่นยนต์ ESP32 5 in 1 - บังคับผ่าน Bluetooth / บังคับผ่าน WIFI / บังคับ ผ่านอินเตอร์เน็ต/ เดินตามเส้น / หลบสิ่งกีดขวาง แบบ DIY (มี ขั้นตอนวิธีทำ และ โค้ด)ชุดคิท หุ่นยนต์ ESP32 4in1 ชุดนี้ สามารถ ทดสอบ ทำโปรเจค ได้หลากหลายรูปแบบ เหมาะสำหรับ โรง…
โปรเจค ESP32 เปิด-ปิดไฟ ผ่านอินเตอร์เน็ตด้วย ESP Rainmaker
1 ปีที่ผ่านมา
ESP RainMaker เป็นแพลตฟอร์มที่ช่วยให้นักพัฒนาสร้างอุปกรณ์ที่เชื่อมต่อกับ ESP32-S2 SoC ของ Espressif โดยไม่ต้องวุ่นวายกับการจัดการโครงสร้างพื้นฐาน มี SDK ของอุปกรณ์ แอปโทรศัพท์ที่ปรับเปลี่ยนได้เอง มิดเดิลแวร์คลาวด์แบบโปร่งใส และยูทิลิตีโฮสต์เพื่อลดควา…
1 ปีที่ผ่านมา
ESP RainMaker เป็นแพลตฟอร์มที่ช่วยให้นักพัฒนาสร้างอุปกรณ์ที่เชื่อมต่อกับ ESP32-S2 SoC ของ Espressif โดยไม่ต้องวุ่นวายกับการจัดการโครงสร้างพื้นฐาน มี SDK ของอุปกรณ์ แอปโทรศัพท์ที่ปรับเปลี่ยนได้เอง มิดเดิลแวร์คลาวด์แบบโปร่งใส และยูทิลิตีโฮสต์เพื่อลดควา…

โปรเจค Arduino เปิด-ปิดไฟ ด้วย โทรศัพท์ ผ่าน แอพบลูทูธ
1 ปีที่ผ่านมา
โปรเจค Arduino: เปิด-ปิดไฟด้วย โทรศัพท์ ผ่าน แอพบลูทูธ การควบคุมการเปิด-ปิดไฟในบ้านหรือสถานที่ต่าง ๆ ได้ง่ายขึ้นด้วยการใช้ Arduino ร่วมกับบลูทูธ. ในบทความนี้, เราจะสร้างโปรเจคที่ใช้ Arduino เพื่อควบคุมไฟผ่านแอพบลูทูธบนโทรศัพท์มือถือของเรา. การทำโปรเจ…
1 ปีที่ผ่านมา
โปรเจค Arduino: เปิด-ปิดไฟด้วย โทรศัพท์ ผ่าน แอพบลูทูธ การควบคุมการเปิด-ปิดไฟในบ้านหรือสถานที่ต่าง ๆ ได้ง่ายขึ้นด้วยการใช้ Arduino ร่วมกับบลูทูธ. ในบทความนี้, เราจะสร้างโปรเจคที่ใช้ Arduino เพื่อควบคุมไฟผ่านแอพบลูทูธบนโทรศัพท์มือถือของเรา. การทำโปรเจ…
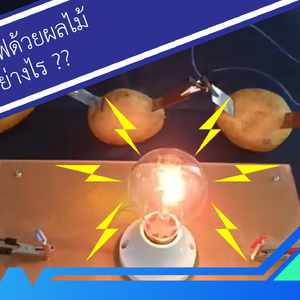
โปรเจค Arduino ไฟฟ้าจากผลไม้ กับ หลอดไฟ 220 โวลต์
1 ปีที่ผ่านมา
สอนทำโปรเจค Arduino ไฟฟ้าจากผลไม้ กับ หลอดไฟ 220 โวลต์ "ทดลองไฟฟ้าจากผลไม้" เป็นการทดลองทางวิทยาศาสตร์ที่น่าสนใจเพื่อศึกษาและทดสอบกระบวนการผลิตไฟฟ้าโดยใช้มันฝรั่งในฐานะวัตถุดิบหลัก. การทดลองนี้มุ่งเน้นการเรียนรู้และทำความเข้าใจถึงพลังงานที่เกิดขึ้นจา…
1 ปีที่ผ่านมา
สอนทำโปรเจค Arduino ไฟฟ้าจากผลไม้ กับ หลอดไฟ 220 โวลต์ "ทดลองไฟฟ้าจากผลไม้" เป็นการทดลองทางวิทยาศาสตร์ที่น่าสนใจเพื่อศึกษาและทดสอบกระบวนการผลิตไฟฟ้าโดยใช้มันฝรั่งในฐานะวัตถุดิบหลัก. การทดลองนี้มุ่งเน้นการเรียนรู้และทำความเข้าใจถึงพลังงานที่เกิดขึ้นจา…
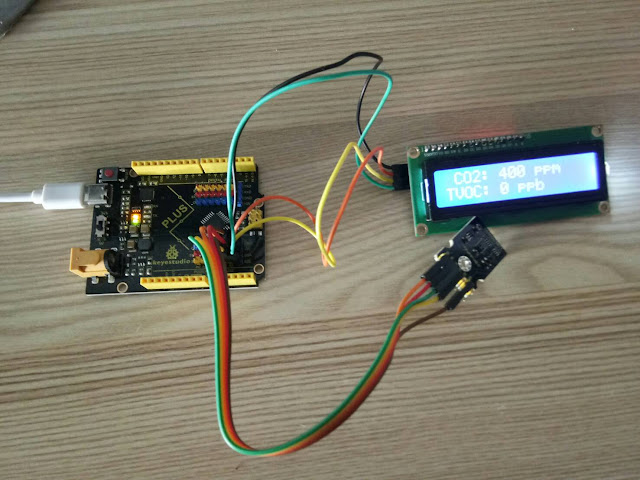
มินิโปรเจค Arduino วัดก๊าซคาร์บอนไดออกไซด์ แสดงผลที่จอ LCD
4 ปีที่ผ่านมา
ระดับคาร์บอนไดออกไซด์ปกติ (Normal CO2 Levels) ระดับคาร์บอนไดออกไซด์ปกติผลกระทบของ CO2 ต่อผู้ใหญ่ที่มีสุขภาพที่ดีสามารถสรุปได้ดังนี้-ระดับกลางแจ้งปกติ: 350 – 450 ppm-ระดับที่ยอมรับได้: <600 ppm=”” span=””>-ข้อร้องเร…
4 ปีที่ผ่านมา
ระดับคาร์บอนไดออกไซด์ปกติ (Normal CO2 Levels) ระดับคาร์บอนไดออกไซด์ปกติผลกระทบของ CO2 ต่อผู้ใหญ่ที่มีสุขภาพที่ดีสามารถสรุปได้ดังนี้-ระดับกลางแจ้งปกติ: 350 – 450 ppm-ระดับที่ยอมรับได้: <600 ppm=”” span=””>-ข้อร้องเร…
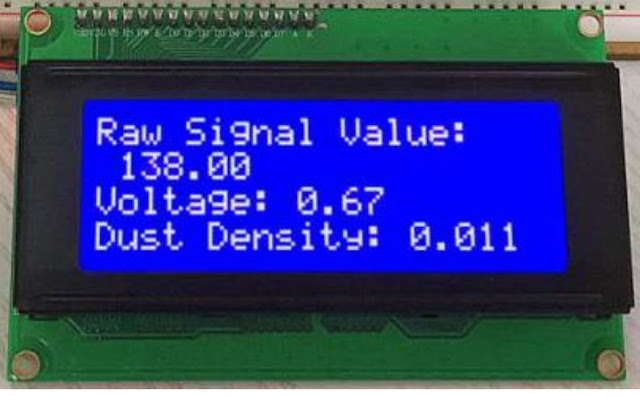
มินิโปรเจค Arduino เครื่องวัดฝุ่น PM2.5 ด้วย เซ็นเซอร์ GP2Y1014AU
4 ปีที่ผ่านมา
เครื่องวัดฝุ่น PM2.5 ด้วย เซ็นเซอร์ GP2Y1014AU บทความนี้ กล่าวถึงขั้นตอนการทำงานโปรเจค เครื่องวัดฝุ่น PM2.5 กับ Arduino UNO โดยใช้ เซ็นเซอร์วัดฝุ่น PM2.5 Keyestudio GP2Y1014AU ของ Sharp เซ็นเซอร์ฝุ่นนี้มีขนาดเล็กและสามารถตรวจจับฝุ่นละอองและอนุภาคควัน…
4 ปีที่ผ่านมา
เครื่องวัดฝุ่น PM2.5 ด้วย เซ็นเซอร์ GP2Y1014AU บทความนี้ กล่าวถึงขั้นตอนการทำงานโปรเจค เครื่องวัดฝุ่น PM2.5 กับ Arduino UNO โดยใช้ เซ็นเซอร์วัดฝุ่น PM2.5 Keyestudio GP2Y1014AU ของ Sharp เซ็นเซอร์ฝุ่นนี้มีขนาดเล็กและสามารถตรวจจับฝุ่นละอองและอนุภาคควัน…
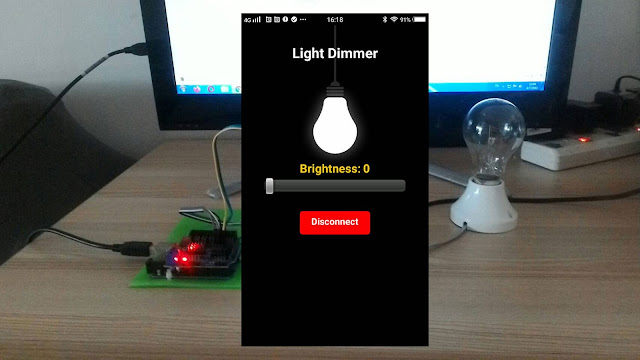
มินิโปรเจค Arduino หรี่ไฟ AC 220V ผ่านบลูทูธ ด้วย App Android
5 ปีที่ผ่านมา
หรี่ไฟ AC 220V ผ่านบลูทูธ ด้วย App Android เป้าหมายและหลักการทำงานของโปรเจค ต้องการหรี่ไฟ หรือควบคุมแสงสว่างของหลอดไฟหรืออุปกรณ์ไฟฟ้าอื่นๆ แบบไร้สายผ่านโทรศัพท์มือถือด้วยแอพแอนดรอยด์ (App Android) เพื่อเป็นการประหยัดพลังงาน และความสะดวกในการควบคุม ซึ…
5 ปีที่ผ่านมา
หรี่ไฟ AC 220V ผ่านบลูทูธ ด้วย App Android เป้าหมายและหลักการทำงานของโปรเจค ต้องการหรี่ไฟ หรือควบคุมแสงสว่างของหลอดไฟหรืออุปกรณ์ไฟฟ้าอื่นๆ แบบไร้สายผ่านโทรศัพท์มือถือด้วยแอพแอนดรอยด์ (App Android) เพื่อเป็นการประหยัดพลังงาน และความสะดวกในการควบคุม ซึ…

มินิโปรเจค สร้างเกม Endless Runner ด้วย Arduino และ จอ LCD
5 ปีที่ผ่านมา
มินิโปรเจค สร้างเกม Endless Runner ด้วย Arduino และ จอ LCD การสร้างเกม ก็คือการเขียนโปรแกรมแบบหนึ่ง ให้แสดงผลถี่ๆ แล้วเขียนโปรแกรมให้การแสดงผลในแต่ละครั้ง ค่อยๆทำให้ตัวละครในภาพค่อยๆขยับ โดยการทำการเปลี่ยนภาพ หรือเคลื่อนที่ตัวละคร ก็จะเกิดการเคลื่อนไ…
5 ปีที่ผ่านมา
มินิโปรเจค สร้างเกม Endless Runner ด้วย Arduino และ จอ LCD การสร้างเกม ก็คือการเขียนโปรแกรมแบบหนึ่ง ให้แสดงผลถี่ๆ แล้วเขียนโปรแกรมให้การแสดงผลในแต่ละครั้ง ค่อยๆทำให้ตัวละครในภาพค่อยๆขยับ โดยการทำการเปลี่ยนภาพ หรือเคลื่อนที่ตัวละคร ก็จะเกิดการเคลื่อนไ…
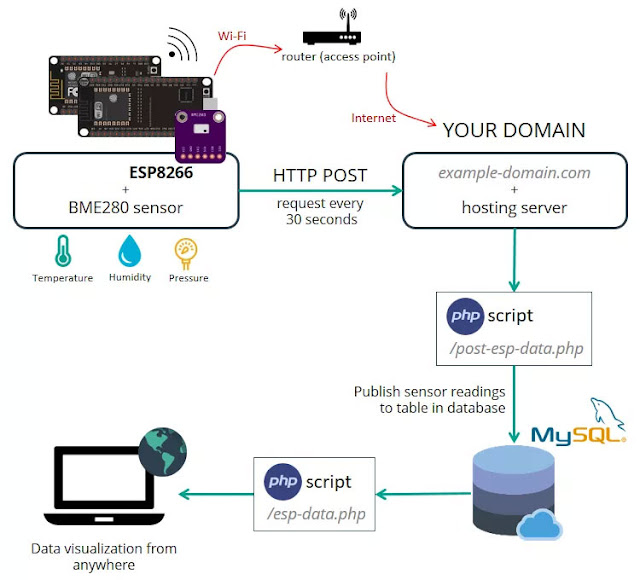
โปรเจค IoT ESP8266 วัดอุณหภูมิ บันทึกลงดาต้าเบส MySQL
5 ปีที่ผ่านมา
เป้าหมายของโปรเจคนี้คือเราต้องดูข้อมูลด้วยการเข้าถึงโดเมน ของเราเอง ไม่ว่าจะอยู่ส่วนไหนของโลก โดย ESP8266 จะสร้างไคลเอ็นต์ ที่ทำให้คำขอ HTTP POST ไปยังสคริปต์ PHP เพื่อแทรกข้อมูล (การอ่านเซ็นเซอร์) ลงในฐานข้อมูล MySQLโดยบทความนี้จะแสดงการส่งข้อมูลจาก…
5 ปีที่ผ่านมา
เป้าหมายของโปรเจคนี้คือเราต้องดูข้อมูลด้วยการเข้าถึงโดเมน ของเราเอง ไม่ว่าจะอยู่ส่วนไหนของโลก โดย ESP8266 จะสร้างไคลเอ็นต์ ที่ทำให้คำขอ HTTP POST ไปยังสคริปต์ PHP เพื่อแทรกข้อมูล (การอ่านเซ็นเซอร์) ลงในฐานข้อมูล MySQLโดยบทความนี้จะแสดงการส่งข้อมูลจาก…
มินิโปรเจค Arduino เปิดปิดไฟ 220V และ หรี่ไฟบ้านด้วยเสียง
5 ปีที่ผ่านมา
ควบคุมการติด-ดับ และ หรี่แสงสว่างหลอดไฟด้วยเสียงปรบมือ แนะนำ : ชุดประกอบสำเร็จ Arduino ควบคุมการติด-ดับ และ หรี่แสงสว่างหลอดไฟด้วยเสียงปรบมือ การทำ มินิโปรเจค Arduino เปิดปิดไฟ 220V และ หรี่ไฟบ้านด้วยเสียง เป้าหมายและหลักการทำงานของโปรเจค ต้องการควบค…
5 ปีที่ผ่านมา
ควบคุมการติด-ดับ และ หรี่แสงสว่างหลอดไฟด้วยเสียงปรบมือ แนะนำ : ชุดประกอบสำเร็จ Arduino ควบคุมการติด-ดับ และ หรี่แสงสว่างหลอดไฟด้วยเสียงปรบมือ การทำ มินิโปรเจค Arduino เปิดปิดไฟ 220V และ หรี่ไฟบ้านด้วยเสียง เป้าหมายและหลักการทำงานของโปรเจค ต้องการควบค…

โปรเจค ESP32-CAM กล้องดักถ่ายภาพอัตโนมัติ ด้วย PIR Motion
5 ปีที่ผ่านมา
โปรเจค ESP32-CAM กล้องดักถ่ายภาพอัตโนมัติ ด้วย PIR Motion โดยโปรเจคนี้ สามารถประยุกต์เป็นกล้องดักถ่ายภาพเมื่อมีผู้บุกรุก หรือเป็นกล้องดักถ่ายภาพสัตว์ มีชื่อเรียกหลายชื่อได้แก่ Trail Cam, Scout Cam, Camera Trap โดยผู้ใช้งานโดยซ่อนไว้ใกล้บริเวณทางที่สั…
5 ปีที่ผ่านมา
โปรเจค ESP32-CAM กล้องดักถ่ายภาพอัตโนมัติ ด้วย PIR Motion โดยโปรเจคนี้ สามารถประยุกต์เป็นกล้องดักถ่ายภาพเมื่อมีผู้บุกรุก หรือเป็นกล้องดักถ่ายภาพสัตว์ มีชื่อเรียกหลายชื่อได้แก่ Trail Cam, Scout Cam, Camera Trap โดยผู้ใช้งานโดยซ่อนไว้ใกล้บริเวณทางที่สั…
มินิโปรเจค Arduino อ่านค่าสี เล่นไฟล์เสียงจาก SD Card ออกลำโพง
5 ปีที่ผ่านมา
มินิโปรเจค Arduino อ่านค่าสี เล่นไฟล์เสียงจาก SD Card ออกลำโพง โปรเจค Arduino พูดโต้ตอบได้ โดยการเล่นไฟล์เสียงจาก SD Card บทความนี้จะสอนใช้งาน Arduino เล่นไฟล์เสียงจาก SD Card ออกลำโพง เราสามารถอัดเสียงพูดหรือบันทึกเสียงเพลงลง SD Card แล้ว สั่งงานให้…
5 ปีที่ผ่านมา
มินิโปรเจค Arduino อ่านค่าสี เล่นไฟล์เสียงจาก SD Card ออกลำโพง โปรเจค Arduino พูดโต้ตอบได้ โดยการเล่นไฟล์เสียงจาก SD Card บทความนี้จะสอนใช้งาน Arduino เล่นไฟล์เสียงจาก SD Card ออกลำโพง เราสามารถอัดเสียงพูดหรือบันทึกเสียงเพลงลง SD Card แล้ว สั่งงานให้…
 โรบอทสยาม อุปกรณ์หุ่นยนต์ Arduino
สมัครสมาชิกร้านนี้ เพื่อรับสิทธิพิเศษ


▲
▼
รายการสั่งซื้อของฉัน
รายการสั่งซื้อของฉัน
ข้อมูลร้านค้านี้

โรบอทสยาม อุปกรณ์หุ่นยนต์ Arduino
จําหน่าย อุปกรณ์หุ่นยนต์ Arduino , ESP8266, ESP32 , STM32 , micro:bit , Paspberry Pi รับประกอบหุ่นยนต์ ชุดคิทหุ่นยนต์ ตัวอย่างโปรเจค IoT (Internet of Things) อินเทอร์เน็ตของสรรพสิ่ง
เบอร์โทร : 095-226-2116
อีเมล : robotsiam16@gmail.com
อีเมล : robotsiam16@gmail.com
ส่งข้อความติดต่อร้าน
เกี่ยวกับร้านค้านี้
ค้นหาสินค้าในร้านนี้
ค้นหาสินค้า
สินค้าที่ดูล่าสุด
บันทึกเป็นร้านโปรด
Join เป็นสมาชิกร้าน
แชร์หน้านี้
แชร์หน้านี้
↑
TOP เลื่อนขึ้นบนสุด
TOP เลื่อนขึ้นบนสุด
สินค้าในตะกร้า ({{total_num}} รายการ)

ขออภัย ขณะนี้ยังไม่มีสินค้าในตะกร้า
ราคาสินค้าทั้งหมด
฿ {{price_format(total_price)}}
- ฿ {{price_format(discount.price)}}
ราคาสินค้าทั้งหมด
{{total_quantity}} ชิ้น
฿ {{price_format(after_product_price)}}
ราคาไม่รวมค่าจัดส่ง
➜ เลือกซื้อสินค้าเพิ่ม